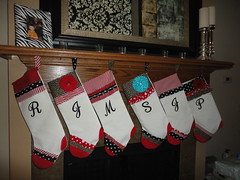
I made our Christmas stockings this year and I love how they turned out! I loved the Pottery Barn Kids ones but so many people have them AND they are expensive unless you get them on sale. And by the time they are on sale they are sold out of the different designs and I kept putting it off. I am glad I did because who woulda thunk we would be a family of six?
I wanted something FUN, WHIMSICAL and NONTRADITIONAL. So these stockings are not for everyone but they are perfect for me!
They really were an EASY sew although a littttttttttttle time consuming to sew down all the detail on the fronts. Overall easypeasy. Here are step by step instructions so you can make your own!
1) Start by laying down an old stocking or a Dollar Tree stocking that you like the shape of on your base fabric. I like to leave my fabric folded like they have it on the bolt and pin through 2 layers so you only have to trace and cut once. Tracing with chalk is a good idea because a wipe of a damp cloth can take it off your fabric.
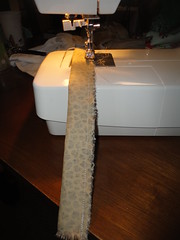
2) Once you have your 2 main pieces cut set them unpin them and set aside. Now take the fabric you want for your hook and cut a piece about 6-8 inches long and 5 inches wide. You are going to fold this pc in half lengthwise RIGHT SIDES TOGETHER and pin together. Sew down the length being sure to double stitch at the beginning and end.
Now turn it rightside out and set aside.
3) Fold down 1/4 inch at the top of each stocking pc and sew being sure that you are sewing the unfinished side in what will be the INSIDE of the stocking.
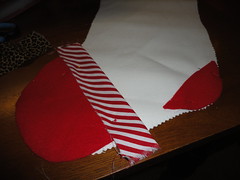
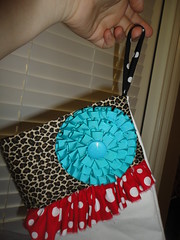
3) Next you are going to design your front of stocking including the fake cuff. Take different ribbons and fabrics and lay out your design leaving extra that hangs over for a seam allowance. Pin everything down. You may have to pin down bottom layers and lay top layers in place to pin down later. Some things like the burlap flower I did on Presley's will need to be hotglued or handsewn.
4) The not hard, hardest part....starting with bottom layers of your design sew them down using straight stitches and zig zag stiches for texture. Once you have completely sewn the design onto the front of your stocking you are close to finished!
5) Put the RIGHT SIDES or FINISHED sides of the 2 stocking pcs together. Pin around and then sew leaving a 1/4 inch seam allowance. Be sure to double stitch at the start and finish. Now go back and trim trim trim all the loose threads and any extra fabric or embellishment that is past the sewn seam allowance.
6) Turn the stocking right side out and you are so close! All you have to do is fold the first pc you did for the hook and pin it inside the stocking. Lay it down and sew it into the cuff portion, being sure to go back over it several times so it can hold the weight of a stuffed stocking.
7) At this point I finally got out my iron (a better seamstress would have had you press your pcs and embellishments but I am lazy) and pressed the entire stocking and ironed on the "fake" embroidered monogram for each of us.
Ta-Da! Done! Easy and Unique and even better, CHEAP!


No comments:
Post a Comment